Picture hanging can be challenging and a hassle if you’re not armed with the right tools to make the job easier.
As there are many things you need to account for when hanging pictures, including how high the picture should be, marking the wall, accounting for the fastener location, and ensuring the picture is level.
Luckily though there are many handy picture hanging tools that help take the guesswork out of hanging a picture.
However, when it comes to picture hanging tools some are definitely better than others.
So we’ve highlighted the 5 best and most popular picture hanging tools on the market today.
What are the Best Tools to Hang Pictures?
Here are the five best and most popular tools for hanging pictures.
- Go Hang It – Best Overall
- Hang-O-Matic – Best for Dual Mount Pictures
- Black+Decker MarkIT – Best for Picture Groupings
- DEKAVA Picture Hanging Kit – Cheapest / Best for Wire Hung Pictures
- Crescent Creative Products Picture Frame Wall Hanging Tool – Most Versatile
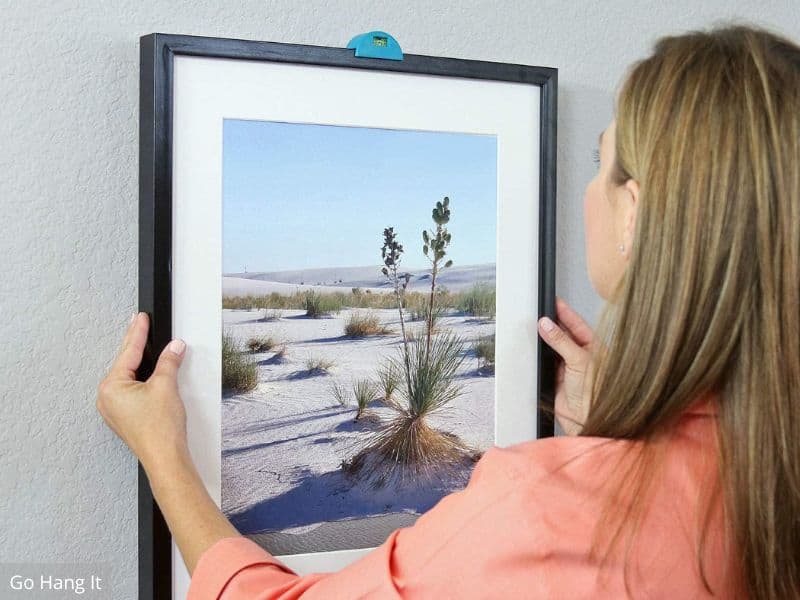
1. Go Hang It – $37
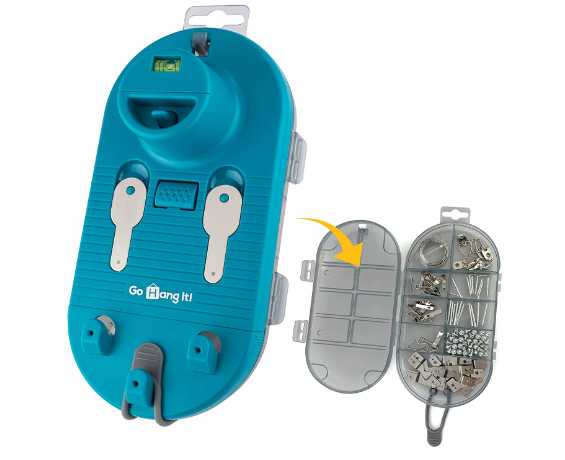
Designed and produced by Inspired Products, which was started by a father-daughter duo.
The Go Hang It is one of the most popular tools for hanging pictures on the market today.
As this all-in-one gadget takes the challenge out of hanging and leveling pictures.
By allowing you to accurately and easily hang saw-tooth, wire, and D-ring picture frames, thanks to its multi-function design and unique positioning system.
Plus as an added bonus, the Go Hang It also includes a hardware kit that includes 85 pieces of mounting and hanging hardware.
Go Hang It Product Demonstration Video
Pros
- All-In-One Multi-Function Design
- Includes all Needed Hardware
- Simple and Easy To Use
- Has Thousands of 5 Star Reviews on Amazon
Cons
- More Expensive Compared to Other Picture Hanging Tools
- Magnetic Keys Used for Hanging Dual Mount Pictures Are Somewhat Weak, Causing the Keys to Fall Occasionally
- Does Not Work Well if the Clips or Hooks Are Mounted to Deep in the Frame
2. Hang-O-Matic – $14
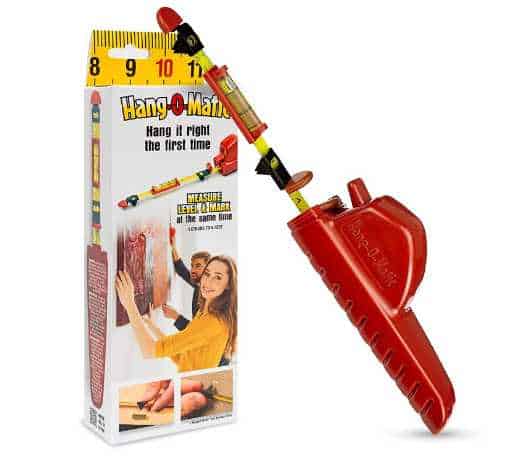
Another really popular picture hanging tool is the Hang-O-Matic, which uses a simpler and more streamlined design compared to the Go Hang It from above.
As the Hang-O-Matic is nothing more than a standard tape measure that has a built-in level and two slide anchors attached.
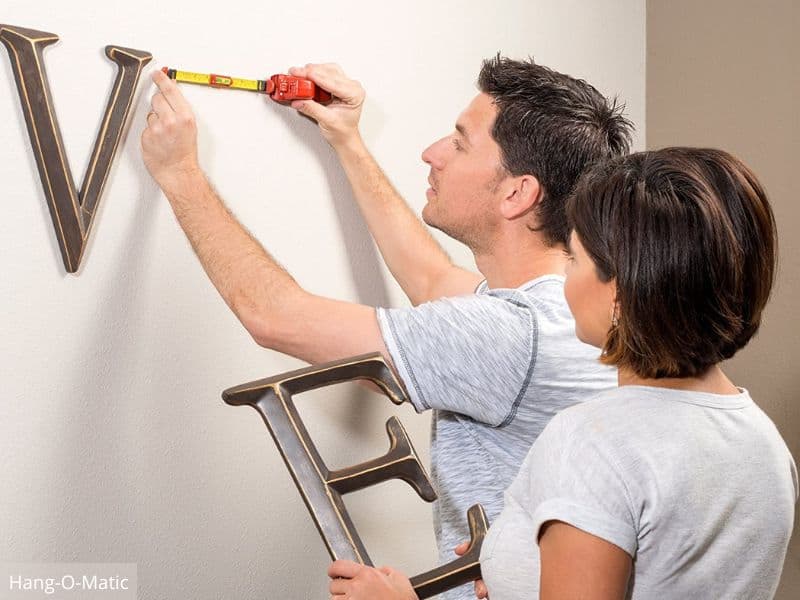
However, despite its more simplistic design, this household tool makes the perfect companion when hanging pictures.
As it takes all the guesswork out of measuring and marking the wall.
And thanks to its built-in level, you can hang any picture perfectly level the first time.
Hang-O-Matic Picture Hanging Tool Demonstration Video
Pros
- Inexpensive
- Has Thousands of 5 Star Reviews on Amazon
- All-In-One Picturing Hanging Tool
- Super Easy To Use
Cons
- Only Useful for Dual Hook Picture Frames
- The Tool is a Little Flimsy
- Can Be Hard To Use the Built-In Level
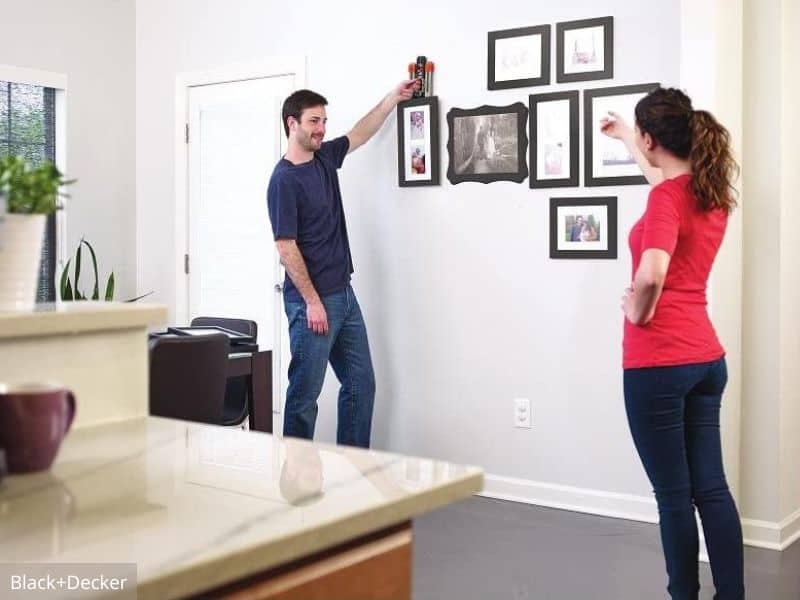
3. Black+Decker MarkIT – $22
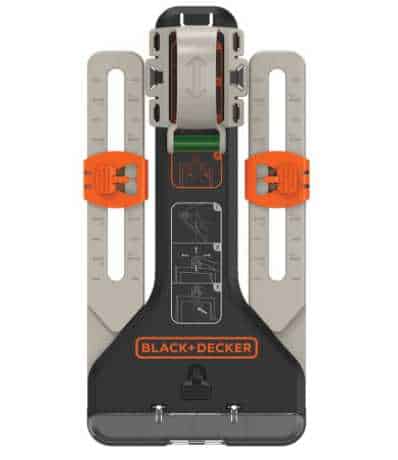
The Black+Decker MarkIT is great for hanging more than one picture at a time.
As the Black+Decker MarkIT can hang up to three pictures at once and make sure they’re perfectly aligned with one another.
Thanks to its unique fold-out arm design that allows you to hang and hold multiple pictures from the gadget at the same time.
And thanks to its built-in level, it’s easy to make sure the pictures are perfectly level without having to fumble with other tools, such as a small torpedo level or carpenters level.
Which helps to make the job of leveling much easier and simpler.
Plus, as an added convenience the Black+Decker MarkIT also has an onboard storage stray that can hold nails, screws, and hooks.
Ensuring that you always have the necessary hanging hardware close at hand.
Black+Decker MarkIT Product Demonstration Video
Pros
- Can Hand Multiple Pictures at the Same Time
- All-In-One Solution
- Built-In Bubble Level
- Onboard Storage Tray
Cons
- Can Only Hang Pictures Up to 6 Pounds
- Can Only Hang Dual Mount Frames Up to 16″ by 20″
- To Hang Multiple Pictures at the Same Time, the Pictures Must be Relatively Small
- Gadget Can Be a Litlle Clumsy to Use
4. DEKAVA Picture Hanging Kit – 15

One of the cheapest and simplest picture hanging tools on the market today is the DEKATA Picture Hanging Kit.
As this picture hanging tool from DEKATA uses an ultra-simple design and only costs about $15.
But don’t let its simple design fool you, because the DEKATA Picture Hanging Kit is still a very capable tool.
As it allows you to hang wire-hung pictures with ease, thanks to its two built-in bubble levels, single or dual point hanging points, and easy-to-use wall markers.
Plus as an added bonus, this handy household picture hanging tool comes with a 200-piece hardware set that includes all the different mounting and hanging hardware you’ll need to hang pictures and mirrors like a pro.
Product Demonstration YouTube VIdeo
Pros
- Most Affordable Option
- Simplest Design
- Built-In Wall Markers Quickly and Easily Mark the Wall
- Includes 200-Piece Hardware Set
Cons
- Only Capable of Hanging Wire-Hung Pictures and Frames
- Not Well Suited for Larger Frames
- Included Hardware Set Lacking Quality
5. Crescent Creative Products Picture Frame Wall Hanging Tool – $23
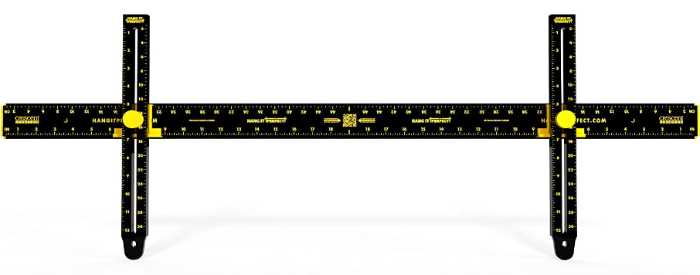
The most versatile all-in-one picture hanging tool has to be the Crescent Creative Products Picture Frame Wall Hanging Tool.
As this best picture hanging tool allows you to position and level everything from frames and mirrors to shelves and art.
This tool from Crescent Creative Products is also one of the few picture hanging tools that allow you to evenly space and position picture groupings.
Making this tool ideal for multi-pictures DIY or crafting projects.
And because this picture hanging tool has a built-in ruler and level it takes the guesswork out of hanging a picture.
Product Demonstration YouTube Video
Pros
- Can Hang a Variety of Objects
- Precisely Positions and Levels
- Built-In Ruler and Level
- Built-In Wall Markers Quickly and Easily Mark the Wall
Cons
- Does Not Include Any Hanging Hardware
- Challenging One Person Operation
- Tool a Little Wobbly When Using Due to Minimal Contact Points with the Wall
How High Should You Hang Pictures?
As a general rule, pictures should be hung from 57 to 60 inches from the center of the picture to the floor or at about eye level.
This will ensure that your pictures are hung at the proper height and prevent you from having to strain your neck while looking at them.
Is It Better to Hang Pictures with Nails or Screws?
There is no one definitive answer to this question, as both methods have their pros and cons.
As nails can be quicker and easier to use, but they can also damage the wall if not properly placed.
Whereas screws can be more secure, but require a drill and are more time-consuming to use.
Whichever method you choose though, just be sure to use the appropriate size nail or screw for the weight of the picture you’re hanging.
And if you’re unsure which size to use, it’s always better to err on the side of caution and go with a larger size.
When in doubt though, you can always ask a professional at your local hardware store for advice.
What Should You Use to Hang Heavy Pictures?
While there are a number of different methods you can use to hang heavy pictures, the most secure and long-lasting option is to use screws.
As screws provide a more stable mounting point that is less likely to come loose over time.
If the picture is particularly heavy though, say over 10 pounds, you need to use a drywall anchor that has the proper weight rating or find a stud behind the wall.
As drywall by itself will only hold between 1.2 to 2.1 pounds per square foot, depending on the thickness of the drywall.
And if you’re unsure how heavy the picture is you’re trying to hang, if it feels heavy, it’s best to use drywall anchors or find a stud when hanging.
You might even need to use multiple mounting points for extremely heaving pictures or mirrors.
Are Command Strips Better Than Nails for Hanging Pictures?
If you’re looking for a fast, easy, and damage-free way to hang pictures, then Command Strips can be a great alternative to nails.
As they don’t require a hammer and won’t leave unsightly holes in the wall if you want to move a picture or decide to redecorate.
Command Strips also come in a variety of sizes and strengths, with the largest Command Strips able to hold up to 16 pounds.
So you can use them to hang anything from a small frame to a medium-size piece of art.
And if you ever need to remove them, they come off cleanly without damaging your walls.
With that being said though, Command Strips due have their limitations and are typically best suited for small and lightweight pictures.
Should Pictures Be Centered on the Wall or the Furniture?
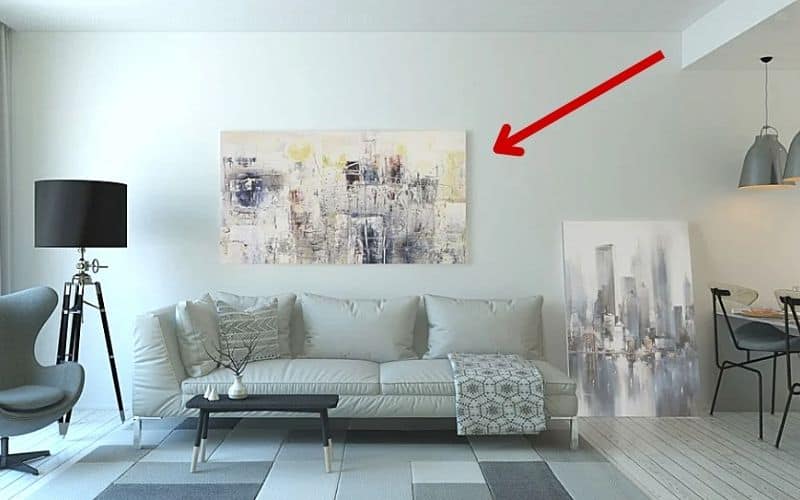
Pictures should always be centered on the furniture and not the wall.
This is because a picture hung in the center of furniture creates a more harmonious look and feel to the room.
While pictures centered on the wall and not the furniture, can throw off the balance of the room and make the room look uncoordinated.
In fact, pictures centered on the wall and not the furniture can even make the room feel subconsciously uncomfortable, even if you’re not able to pinpoint the exact cause or reason why.
How to Hang a Picture If You Don’t Have a Picture Hanging Tool
While picture hanging tools like the ones listed above can make hanging a picture much faster and easier.
You might not always have a picture hanging tool readily available when you need to hang a picture or mirror.
So we thought we would briefly explain the best way to hang a picture without a picture-hanging tool.
Step 1: Find the Proper Placement for the Picture
As stated above the rule of thumb when hanging pictures is that the center of the picture or artwork should be at approximately eye level.
This means you should hang the picture so that the center of the picture is between 57 and 60 inches from the floor.
Step 2: Mark the Placement on the Wall
Mark where the top edge of the picture frame should be by holding the picture to the wall and marking the height with either a small pencil mark or a piece of blue painter’s tape.
Step 3: Figure Out Where the Picture Hanger is Located on the Picture
Next, you want to figure out where the picture hanger is located on the picture, by flipping the picture over and measuring the distance from the top edge of the picture to the fastener or mounting hardware.
For wire-hung pictures don’t forget to stretch the wire out as if it was hanging before taking this measurement.
Step 4: Transfer the Picture Hanger Measurement to the Wall
Once you know the distance from the top edge of the picture to the fastener, you can transfer that measurement to the wall, so you’ll know where to hang the fastener.
Step 5: Mount the Faster or Mounting Hardware to the Wall
Place the lowest point of the hanger to the mark on the wall you just made and attach the hanger tool to the wall.
Wrap Up
Picture hanging can be a challenging and frustrating task, but with the proper picture hanging tool, it doesn’t have to be.
As picture-hanging tools can make hanging a picture much easier, which is why we chose to highlight the best picture-hanging tools in this blog post.
So the next time you need to hang a picture, you’ll be equipped with the best tools, to make picture hanging a breeze.
Thanks for reading!
Recent Posts
Your bedroom is more than just a place to sleep; it's a personal sanctuary where you can unwind, relax, and recharge after a long day. Whether working with a small bedroom or a spacious suite,...
Are you ready to breathe new life into your living room? If so, look no further than modern living room colors, as they can transform your space from drab to fab. As the heart of the home, the...